There’s an innovative solution to conventional labor-intensive, time-consuming processes in ICF construction and it’s only produced by Helix St

How-to Helix Steel: General Contractors’ Guide to Helix® Micro Rebar® for Concrete Construction
Leading a project is challenging when you have to rely on the complexities of antiquated building techniques. It’s time to innovate and embrace a concrete reinforcement that saves you time and money, while delivering a superior product to your client.
Think of all of the jobs you have worked on that have been riddled with scheduling issues, unnecessary labor costs and frustrating concrete cracks. You probably have a longer list than you would like to admit.
Choose Helix Steel’s proactive concrete reinforcement – Helix® Micro Rebar® – and you will never look back.
Why Helix® Micro Rebar® Concrete Reinforcement Instead of Rebar?
Labor
We understand the frustrations associated with high turnover in your crew, and how finding good help has never been harder. Helix® Micro Rebar® replaces rebar in all concrete applications: slabs on grade, foundations, walls, precast, ICF and slabs on metal decks. By reducing rebar, it also minimizes the number of laborers required on a jobsite.
Construction Schedules
Everyone is under strict time constraints and even short delays can lead to bigger issues down the road. Using Helix® Micro Rebar® instead of rebar can save all of the time you usually spend laying rebar – every 10,000 sq. ft. of rebar replaced with Helix® Micro Rebar®can save one full day of construction. Imagine the time saved when you don’t need to place double mats of rebar for hundreds of column foundations!
Your concrete pour time may also be reduced. We help many general contractors who are provided an initial concrete slab design of 8”, but by choosing the highly durable Helix® Micro Rebar®, they were able to reduce the thickness to only 6”.
Jobsite Safety
Crew safety is paramount. By minimizing the number of additional trades required on your jobsite and reducing the heavy equipment, you can make for a safer jobsite. Choosing the much more manageable boxes of Helix® Micro Rebar® can reduce infections as well as back/joint issues in your crew.
Post-Construction Risk
A pleased developer makes for more promising future jobs. Helix® Micro Rebar® delivers higher ratings and lasts longer than rebar. Durability and corrosion resistance results in fewer callbacks – a stronger solution that lasts.
Competitive Bidding
If you keep getting passed over by other contractors for the projects you want and need, make yourself more competitive by greatly reducing the cost of supplying and installing your concrete reinforcement. It is an easy way to provide a better product at a lower cost.
Helix® Micro Rebar® has benefits that far outweigh rebar, while reducing your costs when you factor in the ever-increasing costs associated with labor.
Helix® Micro Rebar® Concrete Reinforcement Mixing, Placing and Finishing
Important Notes:
- Thorough and complete instructions will be provided to all general contractors.
- Compliance with these instructions is essential for the best outcome.
- Failure to comply with these instructions may void your warranty and result in non-compliant concrete.
1. Helix Mix Design and Slump Recommendations
- Refer to the Alternative Design solution for each element of this project to confirm the MPa and the engineers notes for the slump requirements for each element.
- Water reducing admixture is to be used to achieve the specified slump levels (no additional water to be added).
2. Loading and Mixing Instructions
Directly loading at batch plants is preferred.
Option 1: Ready Mix Plants (Dry) – Truck
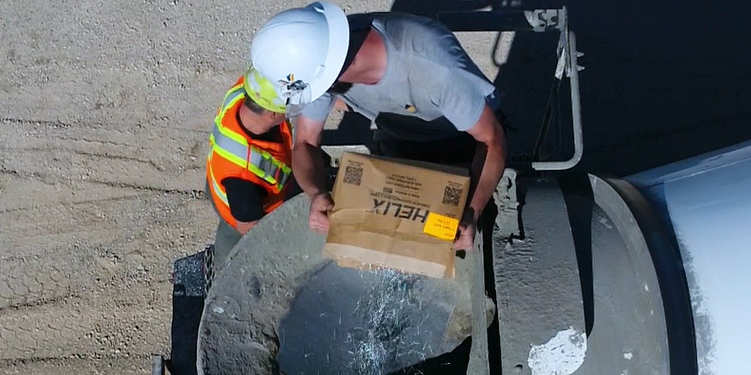
- Add all Helix® Micro Rebar® to the truck drum. Typically this is done by hand, dumping the entire contents of the box into the drum while it is at idle speed. If available, this is done from a slump check stand.
- Drive the truck into the plant.
- Once the truck is in the position under the chute, increase the drum to full charging speed and add a minimum of 50% of the batch water to the truck (more than 50% is okay).
- Allow the Helix® MicroRebar® and the water to mix for no less than 45 seconds while delaying the addition of the remaining materials. NOTE: Once the water and Helix® Micro Rebar® are in the drum and the drum is at charging speed, the drum must NOT decrease in speed until all batching is complete.
- Add aggregate, sand, cement and remaining water to the truck and mix in the normal matter (60 revolutions minimum).
Please view our Dry Mix Ready-Mix Plant video for a visual demonstration of this method.
Option 2: Site Batching into Mix Trucks (Loaded Trucks as Construction Sites)
- Set the drum to charging speed.
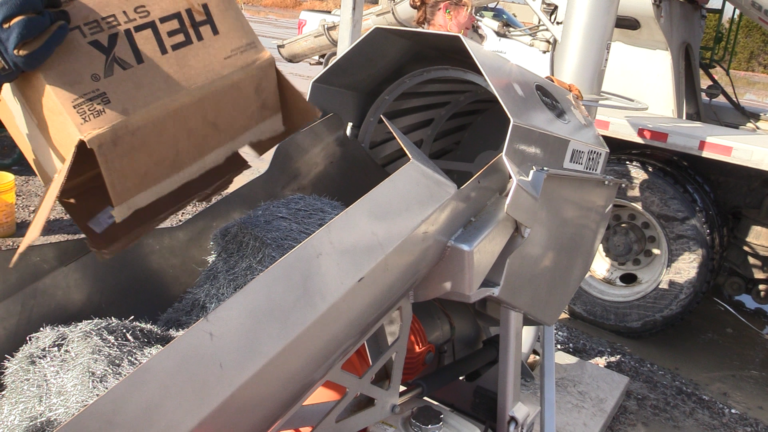
- Sift Helix® Micro Rebar® through a 2’’x 2’’ (50mm x 50mm) mesh or use a Helix® Micro Rebar® Dosing Unit (contact Helix Steel to order). The dosing unit breaks up clumps and ensures Helix® Micro Rebar® goes into the truck at a controlled rate (approximately one box per minute). When Helix® Micro Rebar® is added at this stage, it must enter the mixer clump free.
- When adding Helix® Micro Rebar®, it may collect on residual concrete on the interior surfaces of the hopper. Push the Helix® Micro Rebar® into the drum avoiding clumps. Adding a slippery lining, such as PVC sheeting, to the hopper may help avoid these buildups.
- Mix at charging speed for five minutes (60 revolutions) after Helix® Micro Rebar® is added.
Option 3: Pan Mixer or Drum Mixer
- Set the mixer to the proper speed.
- Add Helix® Micro Rebar® at a rate of 45–60 seconds per 45 lbs (20 kgs).
- Helix® Micro Rebar® should be added with the aggregates.
- Mix at maximum speed for five minutes after Helix® Micro Rebar® is added.
3. Placing Instructions
Helix® Micro Rebar® can be placed using conventional methods – either directly from the concrete truck or through a concrete pump.
Prior to pouring the concrete:
- Check that the sub-base is well prepared and compacted.
- Check that the sub-base is flat and level.
- Check that the plastic membrane is installed.
4. Finishing Instructions
Finishing
- The key to finishing a Helix® Micro Rebar® slab is promoting sufficient fines (sand and cement slurry) to move the surface so that the reinforcement has a creamy slurry paste to settle under. The general finishing processes used to finish Helix® Micro Rebar® reinforced concrete are the same as those used to finish conventionally reinforced concrete.
- Use of a vibrating roller or a laser screed to force coarse materials below the surface is recommended.
- Do not overwork the surface. Overworking will bring water and Helix® Micro Rebar® to the surface.
- Use only metal hand tools for finishing.
- Always pull finishing tools in a constant direction.
- For ‘broom finish’ wait 15–60 minutes after the concrete is placed to apply the brush finish. Brush in one direction only and use a light-bristled broom. Keep the broom clean at all times during the course of the brushing.
- In order to draw creamy slurry to the surface and allow the Helix® Micro Rebar® and coarse aggregates to settle below the surface, it is recommended to pan float for the first 2–5 passes before trowelling. Allow the concrete to bleed its excess water before pan floating so as not to dilute the surface slurry.
Vibrating
- Care should be taken when vibrating concrete in which most, or all of the traditional steel reinforcement has been removed and replaced by Helix® Micro Rebar®. In these instances, the vibrating should be consistent with that applied to plain concrete. Over-vibrating may result in adversely affecting the distribution of the aggregate and the Helix throughout the concrete element.
- For precast concrete elements, care must be taken not to excessively vibrate the concrete as this may result in adversely affecting the distribution of the aggregate and the Helix® Micro Rebar® throughout the mould.
- For smaller precast elements, it is recommended that vibration occur externally with care taken not to use excessive force which can adversely affect the distribution of the aggregate and the Helix® Micro Rebar® throughout the mould.
Saw Cutting
- Ensure saw cuts are installed as detailed in the engineering drawings for the project.
- Saw cuts are recommended to be at least 1/3 of the depth of the slab or otherwise specified in writing by a Helix Steel Engineer.
- The final decision on the precise timing of the saw cuts rests with the concreter who is accountable for the laying and quality of the slab, however, Helix Steel recommends the following:
- Saw cuts are to be made on the same day as the pour using a soft cut saw. (This timing is necessary because it reduces the likelihood of early age cracking occurring).
- Zippering is less likely with Helix® Micro Rebar® as there are no hooked ends and they rarely get caught on the end of the blade. Ensure that the blades of the soft cut saw are not dull or past due for replacement.
- A quality diamond-encrusted continuous rim blade will further enhance the ability of the saw cut / soft cut equipment to grind through the concrete rather than rip it.
Curing
- Concreters must ensure that the concrete is cured in accordance with the relevant sections of AS 3600 Concrete Structures Standard.
- It is recommended that curing should continue for at least seven days.
- Concreters should use aliphatic alcohol to manufacturer’s recommendations in order to slow the evaporation rate and reduce the risk of plastic shrinkage cracking occurring.
- There are many reasons for cracks appearing in concrete during its ‘plastic phase’. This ‘plastic phase’ cracking is in no way connected with the use of Helix® Micro Rebar® or for that matter with the use of reinforcing mesh where it is used. The Helix® Micro Rebar® reinforcement will take full effect when the concrete reaches 20MPa. Care should be taken by the concreter and the customer to ensure that generally accepted preventative measures are taken in the laying of the concrete to ensure that ‘plastic phase’ cracking does not occur.
Your project engineer may need to carry out a verification test to determine that the fibers are dispersed through the concrete. Helix Steel will provide you this information.
How-to Helix: General Contractor Next Steps
These instructions are to give you a rough idea of the processes required to mix, place and finish your concrete, and should not be considered comprehensive. Also keep in mind that the knowledgeable in-house engineers at Helix Steel are here to help you every step of your project’s process.
To begin your Helix® Micro Rebar® journey and request for the complete installation instructions for general contractors, please contact Helix Steel.
More News
Building Better Homes Starts with ICF and Helix Micro Rebar
The Better Way to Build in Every Direction
Whether you’re building below-grade or above-grade, the tiny twisted concrete reinforcement known as Helix Micro Rebar is taking the construction world in new directions
Is Your Business Still Living in the Rebar Age?
If you’re in the construction industry to improve buildings, revolutionize processes and work smarter, it may be time to rethink your concrete reinforcement.
Sign up for our newsletter to stay up to date on the latest news and events from around the industry.